Taking photos in summer is just fun. The days are long and warm, the sun is shining, the colors are shining. Most people have holidays and therefore also time and muse to devote themselves extensively to their hobbies such as photography. If you are one of them, I would like to give you some tips and ideas on how to capture summer in photos.
Here you can find the best tips on nude photography for 2023.
The photographer is free from 11am to 3am
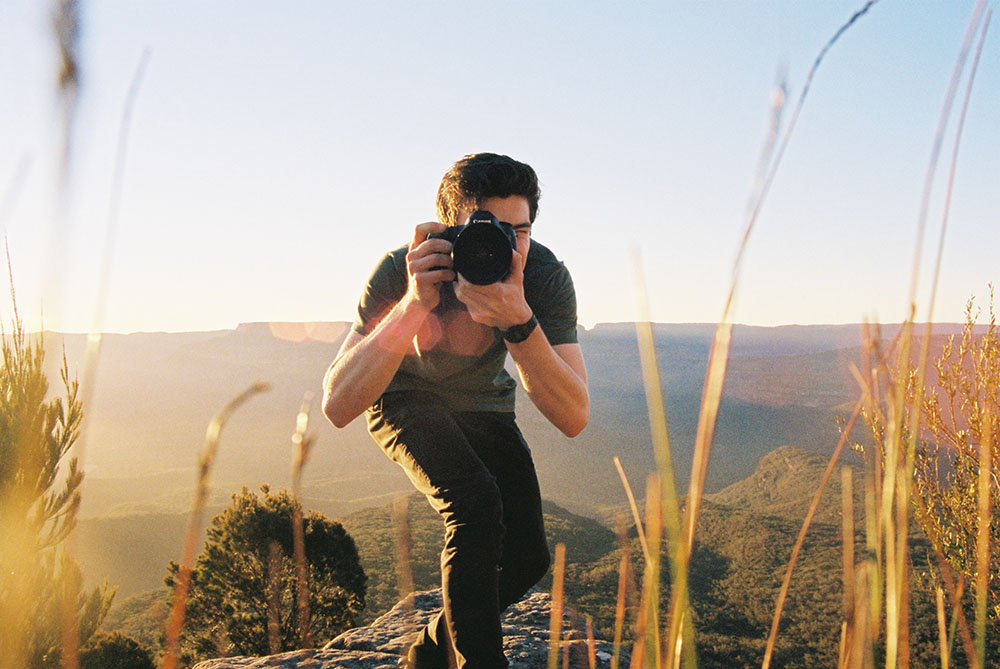
Most people associate summer with baby blue skies and blazing sunshine. As good as it is for our well-being and as tempting as it looks: taking photos in summer is always a certain challenge, because the sun is then higher at its zenith than at any other time of the year.
The problem with this: the higher the sun is in the firmament, the brighter and harder the light emitted. This leads to the colors fading in your photo and there is often an unsightly blue cast, especially in the mountains and with distant subjects. Since the shadows are then also missing, the photo appears flat and lacks depth. If you photograph against the sun, you often have unwanted flares (colorful squiggles and circles) in the picture. In high brightness there is also a risk of overexposure. In addition, the tonal value differences (shadows vs. sunny areas) in the motif are often so great that even modern sensors can hardly cope with them.
It’s no coincidence that the old photographer’s saying goes: “Between eleven and three the photographer is free.” In midsummer you can easily add two hours to the front and back in our latitudes. During this time, as a photographer, you can go out for a refreshing ice cream, build a sandcastle with the kids, or relax in the rubber dinghy. Ahoy!
The best photo time for taking photos in summer
When taking photos in summer, you should better plan the photo time outside midday and ideally in the early morning, late afternoon, morning or evening. Then the light is soft, shadows and light reflections bring three-dimensionality into the picture.
In the golden and the blue hour, particularly atmospheric shots succeed, the landscape is drawn in warm or pastel tones. If you want to find out when these times start, your best bet is to get a smartphone app like SunSurveyor, Photopills, or Photographer’s Ephemeris.
How to deal with extreme brightness
For some reason it is not possible for you to take photos at the times recommended above? Perhaps sweetheart wants a chic portrait on the beach at 12 noon of all days, you spontaneously discover an exciting motif or you simply don’t have time in the morning or evening?
Well, then at least try to make the best of the unfavorable lighting conditions.
Pay attention to the position of the sun. Ideally, you will be able to photograph with your back to the sun (back light). This way you get a better contrast, the colors are less washed out and you avoid flares.
In any case, put the lens hood (Geli) in front of your lens to avoid excessive stray light on your lens. With this you achieve the same as in the first point.
Make sure you have a clean front lens or filter right now if you want to avoid flares.
Lower your ISO number as much as you can, e.g. B. to ISO 100.
Look at your histogram and make sure it isn’t clipping to the right, meaning the image isn’t overexposed (unless you want it as an artistic effect). Alternatively, you can also use the light balance or the light warning on your camera.
I tend to underexpose a bit, my suggestion is half an aperture or half an exposure value (-0.5 EV). For example, you can use the exposure correction of your camera.
If you want to shoot wide open (small f-numbers like f/2.8), for example to get a flowery bokeh for your summer photos or to isolate objects against the background, consider using a gray filter (also known as a neutral density or ND filter). This color-neutral filter swallows light, allowing longer shutter speeds and enabling you to take pictures with an open aperture even in bright ambient conditions.
Be careful when using a polarizing filter: if the sky is already bright blue anyway, a polarizing filter often results in the sky looking completely unnatural and oversaturated in the picture. In the worst case, you also get unsightly color gradients in the picture (especially with wide-angle shots) or create ugly halos (coronas), especially at contrasting edges, for example when you photograph buildings or trees against the sky.
Shoot in RAW format. Then you can usually correct slight overexposures later during image processing. With a JPEG file this is almost impossible.
Feel free, be safe – a summer safety impulse
Summer stands for light-heartedness and now I’m coming to you for sure? Yes, but fear not, I’m not advising you to embalm yourself with SPF50 sunscreen or not swim too far out.
One thing is important for me to mention though: if you’re shooting with an SLR camera, never look at the sun through the optical viewfinder! In the worst case, this can irreversibly damage your eyes and lead to blindness. Always use the live view instead. This risk does not exist with mirrorless cameras with their electronic viewfinder.
And if you love your camera, another tip. If you’re shooting at the beach, try to avoid changing lenses as much as possible. Sand and salty air are poison for your camera sensor and also tend to lead to annoying sensor spots. You then have to laboriously stamp them away again later in the image processing. You can make better use of the time, for example sipping a delicious summer cocktail.
How to capture the happy summer flair
Do you know these typical motifs from travel catalogs, postcards and calendars that immediately trigger a longing for summer and vacation? Have you ever wondered why they evoke these feelings in us? And how do you manage to take photos that really make you feel the summer?
Such advertising photos work simply because they trigger our subconscious with all its images, memories and associations. On the one hand, this is achieved with the targeted selection of certain motifs in the picture. Think about what you associate with summer and look for exactly these things for your picture composition. Some classics as inspiration: sea, waves, beaches, sky, sailing boats, ships, maritime, palm trees, piers, beach chairs, groins, starfish, ..
Another perfectly effective stylistic device is the use of certain colors in the picture. Do you remember the legendary Raffaelo or Bacardi commercials? What colors do you have in mind? Quite likely something like turquoise, shades of blue and green, and lots of white. So keep an eye out for exactly these colors if you want to exude summer flair with your photos.
Bacardi Feeling – Caribbean watercolors
Have you ever been to a dream beach with turquoise water? But when you got home you realized that the great colors in your photo didn’t come across that well. So that it works better next time, I’ll tell you some photographic tricks with which you can immortalize the bright watercolors in your photo, whether you’re photographing the sea, a lake or a river:
- Look for places on the water that are relatively shallow (sandbanks, gently sloping shore areas).
- A light, fairly solid surface is ideal, e.g. B. sand or a pebble bed.
- Use a polarizing filter to prevent reflections on the water surface and thus make the water colors stand out better.
- Look for higher positions for your shots, then the watercolors will appear much more intense.
- The colors shine the most when you photograph from a bird’s eye view. So if you own a drone (and you’re not in a protected area), let it fly and surprise you.
- The best days for bright water colors are days with little wind and waves, i.e. when the water surface is as smooth as possible.
- Also try a long exposure. Due to the additional smoothing of the water, its colors often appear more intense. You can do this again with a gray filter (see above).
- You should also heed the tips from the third section, pay special attention to the position of the sun and put on your lens hood.
Summer cheer with colorful summer flowers
Of course, not only the “Caribbean tones” belong to summer, but also the strong colors of the summer flowers. Just think of the bright red poppies, bright yellow sunflowers or blue cornflowers. These not only look great and are in themselves a great photo motif. They also conjure up happiness in every photo and thus perfectly symbolize the theme of summer.
You can also find them almost everywhere in Germany, even in urban areas. For example, I found the huge poppy field above at the entrance to my hometown Halle (Saale).
Please smile – holiday photos of loved ones
Shooting portraits in summer
Of course, taking photos in summer and on vacation also includes one or the other souvenir photo with family & friends on the beach or wherever it takes you.
If you want to photograph people in broad daylight, the best way to do it is to put them in the shade. Then they don’t blink and you also avoid ugly highlights in the face (overexposure). If you want to do it like the pros, you can also lighten the face a little with a reflector. These are also available as a foldable version for a few euros, so that they fit in any beach bag. Or you use a clip-on flash, preferably one with intelligent automatic exposure control (e.g. Nikon’s iTTL) and thus compensate for the extreme differences in brightness on a summer’s day.
Do you want to take a chic beach portrait of sweetie with a blurred background, like you see in fashion magazines? To do this, you simply have to open your aperture wide, i.e. a small f-number such as e.g. B. choose f/2.8. The problem with this: with the aperture wide open on a sunny summer day, you need an extremely short exposure time so that your photo is not overexposed. Here, however, the cameras have technical limits. With professional cameras, 1/8000 second is usually the end, cheaper cameras are sometimes far above that. However, even the very short shutter speed of premium cameras can still be too long when the sun is blazing down in the sky.
The trick then is to use a gray filter/ND filter (see also above). This swallows light, so it extends the exposure time. This allows you to create a blurred background even in the harshest of environments. This is exactly the reason why fashion photographers also like to use it.
If you want to breathe a pinch of summer into your portraits, use some suitable accessories for your model, which symbolize the warm season. Whether summer dress, linen shirt, cocktail, diving goggles, ice cream or sun hat. Your imagination knows no boundaries.
Photographing your loved ones differently in summer
In order to immortalize your loved ones in the summer holiday photo, it doesn’t always have to be the classic portrait. Feel free to try out creative variations. For example, you could take a silhouette of Schatzi in front of the glowing sunset. Or you choose a particularly wide perspective and prominently integrate the holiday surroundings, for example a beautiful palm beach or the summery mountain scenery.
You can even go one step further and stage your photo like a director. Friends and family then become actors in your photo, so to speak. An example: let your loved ones run up to you on the beach and jump in the air. Your picture automatically spreads a good mood and gives the viewer of your photo a happy holiday feeling. With the help of the self-timer, the interval function or a remote control, you can of course also be in the picture yourself.


